React Native
Instructions for installing Purchases SDK for React Native
What is RevenueCat?
RevenueCat provides a backend and a wrapper around StoreKit and Google Play Billing to make implementing in-app purchases and subscriptions easy. With our SDK, you can build and manage your app business on any platform without having to maintain IAP infrastructure. You can read more about how RevenueCat fits into your app or you can sign up free to start building.
Installation
Option 1: React-Native package
Purchases for React-Native can be installed either via npm or yarn.
We recommend using the latest version of React Native, or making sure that the version is at least greater than 0.64.
Option 1.1: Using auto-linking
Recent versions of React Native will automatically link the SDK, so all that's needed is to install the library.
npm install --save react-native-purchases
yarn add react-native-purchases
Option 1.2: Manual linking
npm install --save react-native-purchases
yarn add react-native-purchases
After that, you should link the library to the native projects by doing:
react-native link react-native-purchases
Option 2: Using Expo
RevenueCat with Expo, you will have to create Development Builds, which can be done either by using EAS, or by making builds that are compatible with Xcode and Android Studio.
There are detailed instructions for doing either one in this page:
https://docs.expo.dev/development/build/
We also have a blog post that goes step-by-step into how to make an app with Expo and RevenueCat using EAS: https://www.revenuecat.com/blog/in-app-puchase-expo-managed-workflow/
How to solve
TypeError: null is not an object (evaluating 'RNPurchases.setupPurchases')You will get this error when trying to run the app with Expo Go. Due to technical limitations, you need to run Development Builds of the app through one of paths outlined in Expo docs in order to use our SDK.
Additional iOS Setup
Important: Make sure that the deployment target for iOS is set to at least 11.0 as defined here, both in the project and in the Podfile if you're using Cocoapods.
Option 1. Installing with Cocoapods / ExpoKit (with Auto-linking)
If you've installed the library using Auto-linking, then all you need to do is to run pod install from your iOS folder.
That's it! You can skip ahead to importing the framework
Option 2. Installing with Cocoapods / ExpoKit (Manual linking only)
If your project already uses Cocoapods to install iOS dependencies, common in ExpoKit projects, linking the library should have added it to the podfile. If it hasn't, add the following to your project's podfile to reference the library from your node_modules folder:
pod 'RNPurchases', :path => '../node_modules/react-native-purchases', :inhibit_warnings => true, :modular_headers => false
In your iOS folder, run pod install. If you've just upgraded ExpoKit, you might need to upgrade cocoapods to the newest version: sudo gem install cocoapods.
That's it! You can skip ahead to importing the framework
Option 3. Manually adding the framework (if you're not using Cocoapods)
If you are not using Cocoapods to manage dependencies, Purchases.framework also needs to be added to your iOS project. The npm install will download the correct framework version and the link command will add libRNPurchases.a to the Linked Frameworks and Libraries of your app target in the iOS project.
If you choose to install the framework via CocoaPods, you can skip ahead to importing the framework
Create a Framework Reference in your project
- Drag
Purchases.frameworkandPurchasesHybridCommon.frameworkfrom theRNPurchasessub-project under the libraries section to the outer project and create a reference.

Add iOS Framework to Embedded Binaries
- In Xcode, in project manager, select your app target.
- Select the general tab
- Drag
Purchases.frameworkandPurchasesHybridCommon.frameworkfrom your project to the Embedded Binaries section

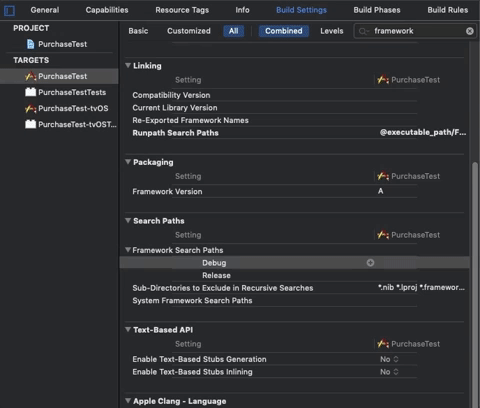
Add $(PROJECT_DIR)/../node_modules/react-native-purchases/ios to Framework Search paths in build settings
Add Strip Frameworks Phase
The App Store, in its infinite wisdom, still rejects fat frameworks, so we need to strip our framework before it is deployed. To do this, add the following script phase to your build.
- In Xcode, in project manager, select your app target.
- Open the
Build Phasestab - Add a new
Run Script, name itStrip Frameworks - Add the following command
"${PROJECT_DIR}/../node_modules/react-native-purchases/ios/strip-frameworks.sh"(quotes included)

Link static library
The react-native link command should have added the libRNPurchases.a library to the Linked Frameworks and Libraries section of your app target. If it hasn't add it like this:

Import Purchases
You should now be able to import Purchases.
import Purchases from 'react-native-purchases';
Include BILLING permission for Android projects
Don't forget to include the
BILLINGpermission in your AndroidManifest.xml file
<uses-permission android:name="com.android.vending.BILLING" />
Enable In-App Purchase capability for your iOS project
Don't forget to enable the In-App Purchase capability for your project under
Project Target -> Capabilities -> In-App Purchase

Expo special instructions
react-native-purchases works with all of the approaches that Expo offers. These approaches are managed workflow, bare workflow, and ExpoKit.
Managed workflow
The managed workflow allows developers to only write JavaScript / TypeScript while letting Expo tools and services take care of everything else. The Android and iOS apps are built using Expo's build service and generate development and production binaries for testing and releasing.
As of mid 2021, the managed workflow now supports in-app payments and works with react-native-purchases. Performing a expo install react-native-purchases is all that needs to be done before you can start implementing RevenueCat into your app.
Note: Expo's doc states that in-app payments will only work on real Android and iOS devices which can make debugging more difficult. You can view the RevenueCat debug logs on Android with LogCat and iOS with Console.app.
Get started with the managed workflow at here
Bare workflow
The bare workflow gives developers complete native control but also allows the use of Expo libraries and services. The bare workflow is similar to a project you would get from npx react-native init.
If you're planning on ejecting from Expo to use the bare workflow, upgrade your expo version first, THEN eject. It'll save you a whole lot of hassle.
Get started with the bare workflow here
ExpoKit (deprecated)
ExpoKit has been deprecated but ExpoKit projects of version 33 to 38 can successfully use react-native-purchases. If you haven't upgraded, you can follow the instructions here to upgrade.
Next Steps
- Now that you've installed the Purchases SDK in your React Native app, get started by initializing an instance of Purchases
Updated 8 days ago