Amazon S3
Setting up S3 access keys for data transfer
To start receiving these deliveries, you'll need the following details:
- Access key ID
- Secret access key
- S3 bucket name
Once you have this information, you can add it to the S3 integration settings for your project in RevenueCat.
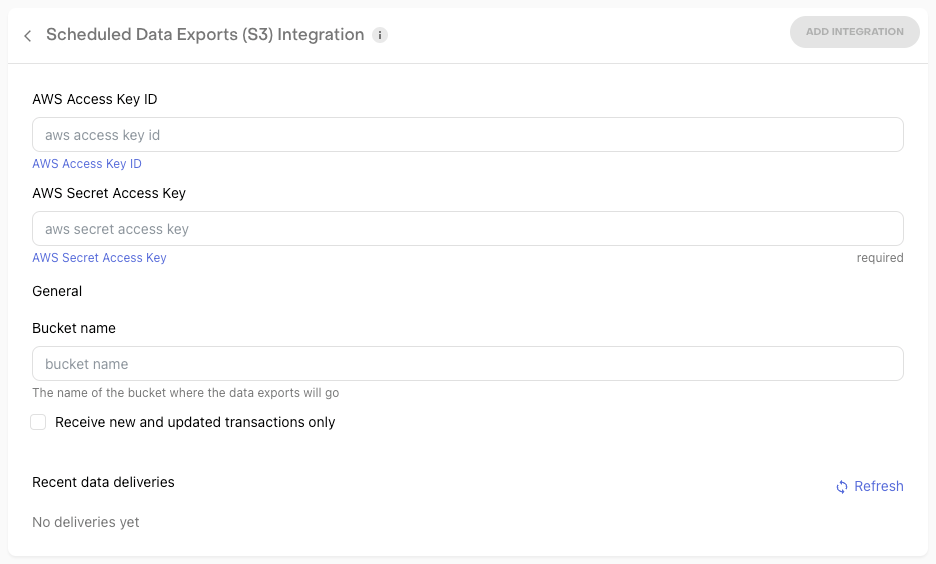
S3 delivery configuration in RevenueCat dashboard
Allow 24 hours for initial delivery
Once you've configured the S3 integration in RevenueCat, allow up to 24 hours before the first file is delivered.
Receive new and updated transactions only
When configuring the deliveries, you have the option to receive a full export daily or only new and updated transactions from the last export. The first delivery will always be a full export even if this option is selected.
Creating Amazon S3 Credentials
The below steps outline how to create an Access Key in your AWS console that RevenueCat will need to complete data deliveries.
1. Create Access Policy
You should only give RevenueCat access to the minimum resources necessary. To do this, create a new policy that only allows access to the S3 bucket where you want your deliveries to go.
Navigate to the IAM Policy dashboard in your AWS console and click ‘Create policy’: https://console.aws.amazon.com/iam/home#/policies

In the policy editor, switch to the JSON view and paste in the following code. Be sure to replace revenuecat-deliveries with the name of your bucket.
{
    "Version": "2012-10-17",
    "Statement": [
        {
            "Sid": "ListObjectsInBucket",
            "Effect": "Allow",
            "Action": [
                "s3:ListBucket"
            ],
            "Resource": [
                "arn:aws:s3:::revenuecat-deliveries"
            ]
        },
        {
            "Sid": "AllObjectActions",
            "Effect": "Allow",
            "Action": "s3:*Object",
            "Resource": [
                "arn:aws:s3:::revenuecat-deliveries/*"
            ]
        }
    ]
}
This policy will allow RevenueCat to list the contents of your bucket, as well as read, write, delete files to it. When you've pasted in the code, click Review policy*.

Finally, give the policy a name and description.
2. Create IAM User
You'll next need to create an individual user that only has access to the policy you just created in Step 1.
Navigate to the IAM User dashboard in your AWS console and click Add user: https://console.aws.amazon.com/iam/home#/users

Enter a User name and choose Programmatic access.

Choose the option to Add user to a group, and click Create group.

Select the Policy name you created from Step 1, then click Create group.

Once the group is created, select it and click Next, optionally add any tags to the group.

Review and click Create user.

Finally, you can download the secure access credentials or copy them from the dashboard.

Updated 8 days ago